Installing your own attic boarding is a very achievable task, but there are a number of factors that should be considered and understood before starting the process. Safety is paramount, and we always advise to start by having a checklist of safety measures and ensuring they are all met.
Before we go any further, we have some useful attic boarding tips that you may not be aware of!
- The area you choose for your StoreFloor doesn’t need to be square or rectangular, some prefer an L or T shape.
- There is no need to clear all your belongings from the attic before you start – you can clear a small area, start there, and then clear the next section.
- You may decide not to board right up to the edges because the height is reduced here (the eaves). You should also leave gaps for ventilation at the eaves.
- If there is anything fixed in your attic that you need access to (water tank for example), make sure you create a continuous path from the attic hatch to this destination.
- StoreFloor is designed to protect up to 350mm of attic insulation and can be fitted before, during or after the insulation.
Before you begin boarding your attic…
Before you start laying your attic boards it’s important to prep your attic space. There’s nothing worse than starting something and realising you need to undo something you’ve done – it can make the whole process longer than it needs it to be. So you’re wondering what you need to prep?
- Only install this product in a well-ventilated attic that is free from condensation.
- Ensure safe access to your attic and provide adequate lighting, taking care of trailing cables.
- Clear the area where StoreFloor will be located and load all materials into the attic, making sure they cannot slide back as you lift them up.
- Lay insulation between the joists, up to the top of the joist, if this has not already been done. Temporarily roll back any insulation above the joists; this will be replaced once StoreFloor is fitted.
Installing the Attic Boarding…
So you’ve done all your prep and you’re ready to start laying your StoreFloor. There are 5 or 6 steps you will need to follow carefully. To summarise we have set out the stages below:
- Approximately set out where all the Tri-Supports will be located.
- Screw in the Tri-Supports to the joist.
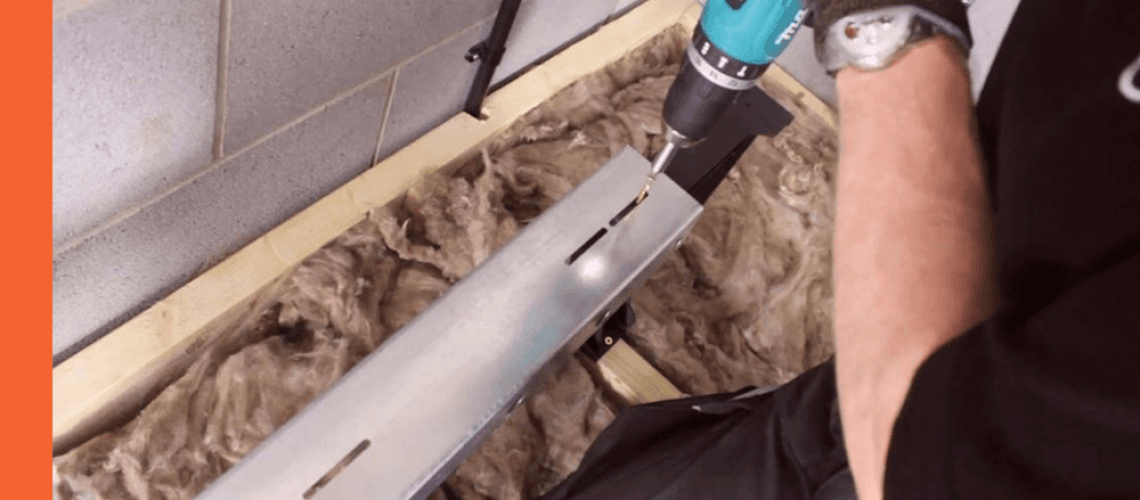
- Slide the cross beams on to the Tri-Supports (A) and once in position screw down firmly, using the slit on the cross beam and the pre-drilled hole on the Tri-Support.
- Install a Uni-Support by placing it on the Cross-Beam and locking it onto the joist. Once again screw down firmly. Then distribute the Uni-Supports evenly under the StoreFloor.
- Now roll the full depth of insulation into position and screw the attic board flooring directly into the metal Cross-Beams.
- This step is optional, but you can choose to make good the area around the attic hatch.
Download our StoreFloor installation guide!
You’re probably thinking this sounds very simple, and the truth is, it is simple. We have created an Installation Guide which takes you through everything discussed in this article, but in a lot more detail. Follow this guide and you’ll have a new fabulous storage space in no time.

